WP Sites Monitor
WARNING
This plugin is no longer maintained, check out Relay for its successor.
Links
Introduction
Sites Monitor is a plugin which allows you to monitor your websites from a single WordPress site, it calls this site the monitor. It is a handy plugin for companies, agency’s, freelancers and other sites owners which maintain multiple WordPress websites and are looking to have a quick overview on the current state of those sites or want a cool dashboard to show at the office when a client walks in.
Getting started
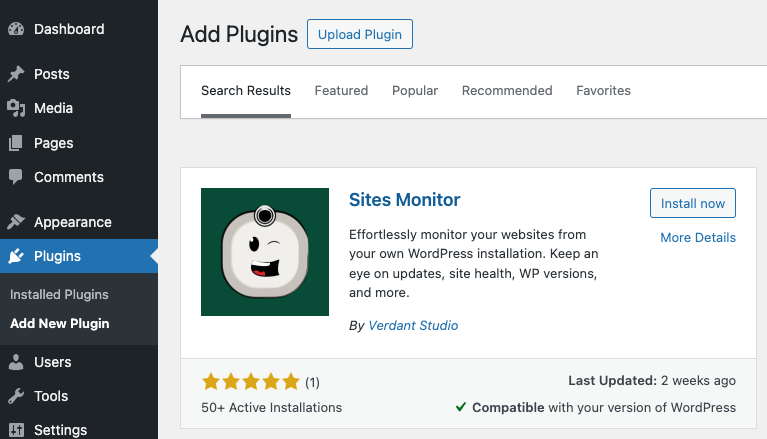
1. Install and activate the plugin
Download and install the plugin from the WordPress plugin directory. You should do this for both the site receiving the metrics (the monitor) and the site sending the metrics.
2. Configure the plugin on the monitor site
Head over to the website you want to act as the monitor (the site receiving the information) log into the /wp-admin and head over to Settings > Sites Monitor

Select Monitor as the type of website and hit Save. The page should now refresh, and you should see a new tab (Custom Post Type) called Sites. There is no manual action required there, it'll empty for as long as we haven't synchronised anything.
3. Create a application password on the monitor site
Now go to your user settings and create a application password, you can pick any name you like. This step is only required once, you can use the same application password to connect your sites to the monitor.
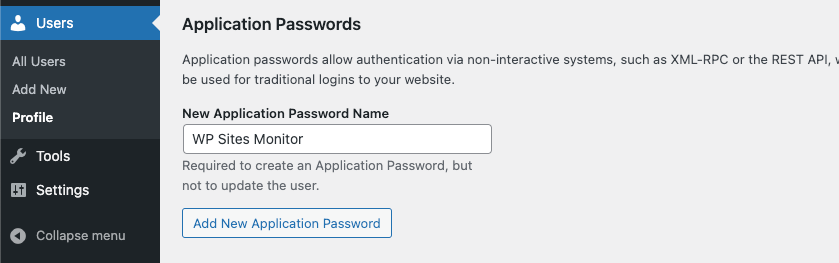
Hit Add New Application Password and store it because we'll need it in the next step.
4. Configure the plugin on the site
Head over to the site which we want to be monitoring and go to the Sites Monitor settings at Settings > Sites Monitor.
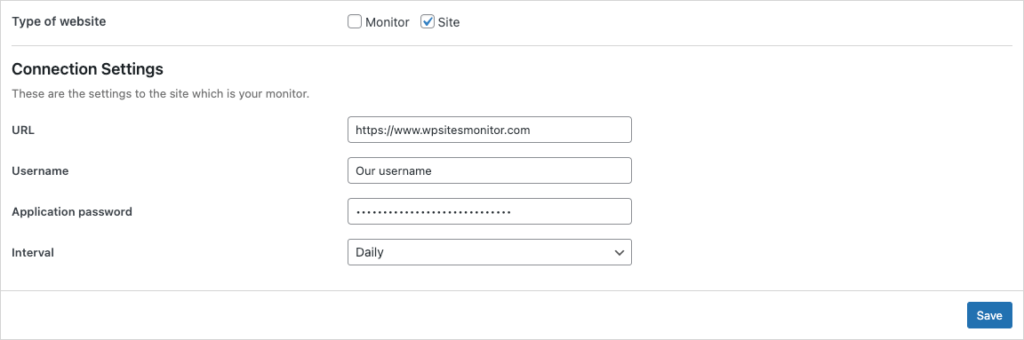
Select Site as the type of website and fill out your connection settings, the username is your WordPress username on the monitor site and the application password is the one we generated in the previous step. When you’re satisfied with the settings hit Save.
If you see no errors the site should be successfully connected.
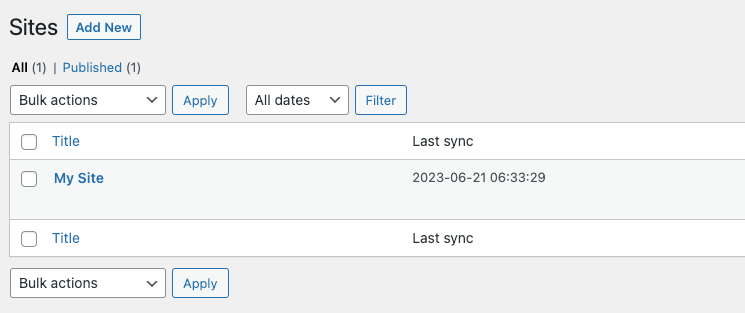
5. Final steps on our monitor site
Now back to our monitor site we can verify if the synchronisation went well by visiting our Sites tab (Custom Post Type). It should now have an entry.
5.1 Flush permalinks
Because this plugin registers a new Custom Post Type, we should flush the permalinks. We can do this by visiting the Settings > Permalinks page on our monitor site. A visit should be enough we do not need to save the page.
Note: flushing permalinks is a common practice with WordPress when you register a new Custom Post Type which registers its own route (in our case /sites/<id>).
5.2 List the sites on a page by using the Gutenberg block
As the final step we can add the Sites Monitor List block to a page to create a overview of all our websites. Add or edit a page and search for the Sites Monitor List block. Hit Publish or Update and view the page.

6. All set!

🎉 You have now set up the Sites Monitor plugin and you can now monitor your websites. Clicking on a site will take you to the detail page giving you more metrics.
Seems like a lot? Well most of this was one time only
Configuring the monitor site is only something you would have to do once. With your next websites all you have to do is connect them (step 4) and you can skip the other steps.
Adding clients
Once you've connected a site to a monitor you can add clients to identify what brand or company a site belongs to. This can be especially handy if clients have more than one site with you or have names which are not directly associated with sites.
INFO
Please note: this is premium functionality.
1. Go to your monitor site
First, head over to the site which acts as your monitor and log into the WordPress admin.
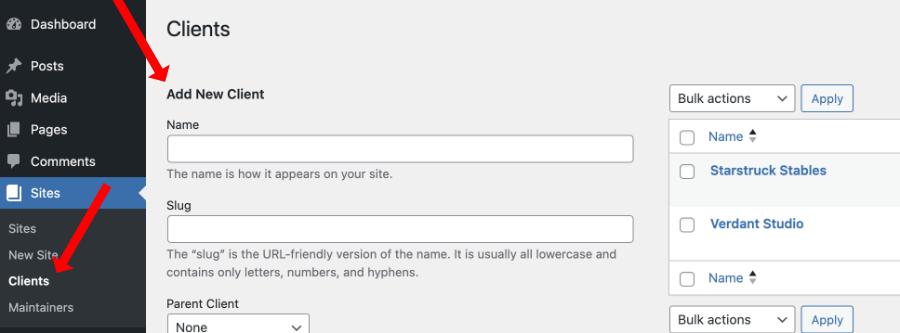
2. The clients taxonomy
Now click on the "Sites" post type, you should now see a "Clients" taxonomy, click on it to view its settings. This page is where you can manage your clients.
3. Assigning client(s) to a site
Now head over to a site and open the Site panel on the right. You should see a "Clients" panel. Select a client (or plural) and hit save.
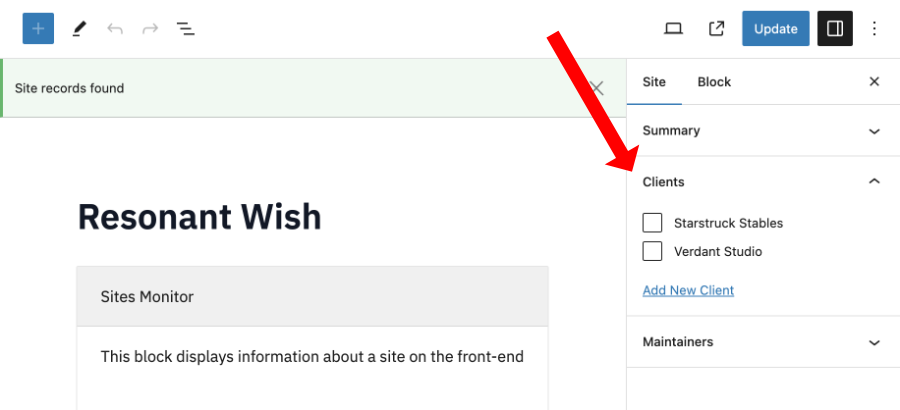
4. All done!
Your sites overview and a site's detail page should now show you it's client(s).
Adding maintainers
Once you’ve connected a site to a monitor you can add maintainers to identify who’s responsible for maintaining the site.
INFO
Please note: this is premium functionality.
1. Go to your monitor site
First, head over to the site which acts as your monitor and log into the WordPress admin.
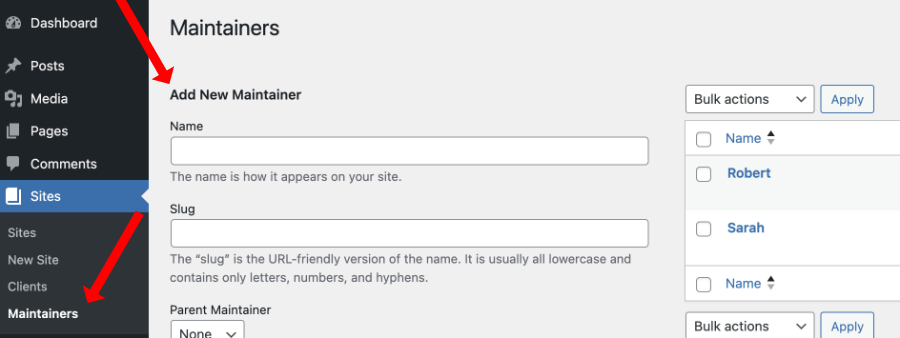
2. The maintainers taxonomy
Now click on the "Sites" post type, you should now see a "Maintainers" taxonomy, click on it to view its settings. This page is where you can manage your maintainers (these could be the names of your colleagues).
3. Assigning maintainer(s) to a site
Now head over to a site and open the Site panel on the right. You should see a "Maintainers" panel. Select a maintainer (or plural) and hit save.
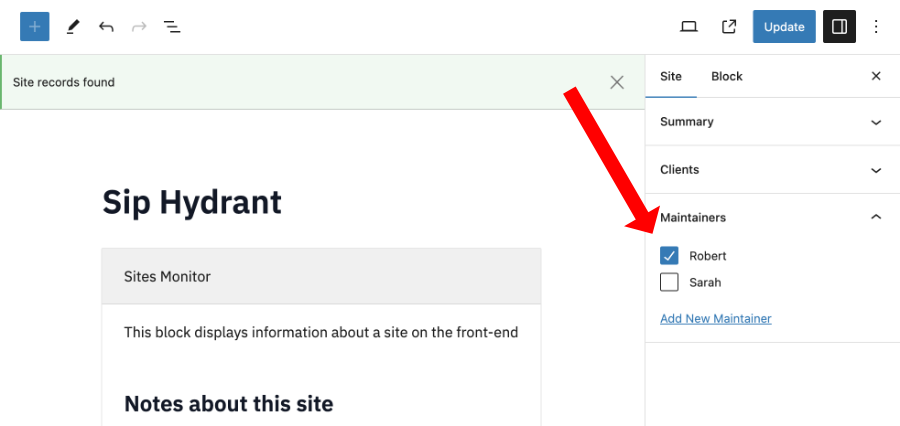
4. All done!
Your sites overview and a site’s detail page should now show you it’s maintainer(s).
Adding notes
Once you’ve linked a site to a monitor, you have the ability to append notes to it, serving either as personal reminders or for sharing crucial information among colleagues (or your support department). This feature is available starting from version 1.3.0.
INFO
Please note: this is premium functionality.
1. Go to your monitor site
First, head over to the site which acts as your monitor and log into the WordPress admin.
2. Open a site on the wp-admin
Next, click on the "Sites" post type and open up the site you’ve linked.
3. Write a site note
The Gutenberg block contains a rich text editor in which you can write your notes. You can insert code snippets, apply text effects such as bold, italic, underline, strikethrough, highlights, subscript, superscript and apply text language/direction.
4. All done!
Your sites overview should now show you the note you’ve just written.
Sending notifications
Sending notifications to clients when their WordPress websites are updated is an excellent way to demonstrate that you are actively maintaining and improving their sites. Additionally, you can encourage clients to help test the latest changes, as they are often the most familiar with their site’s content and functionality. Their feedback can be invaluable, given their extensive experience writing content, engaging with their audience, and understanding their site inside and out.
The Sites Monitor WordPress plugin enables you to get in touch with your clients and communicate information to them.
INFO
Please note: this is premium functionality.
1. The plugin settings
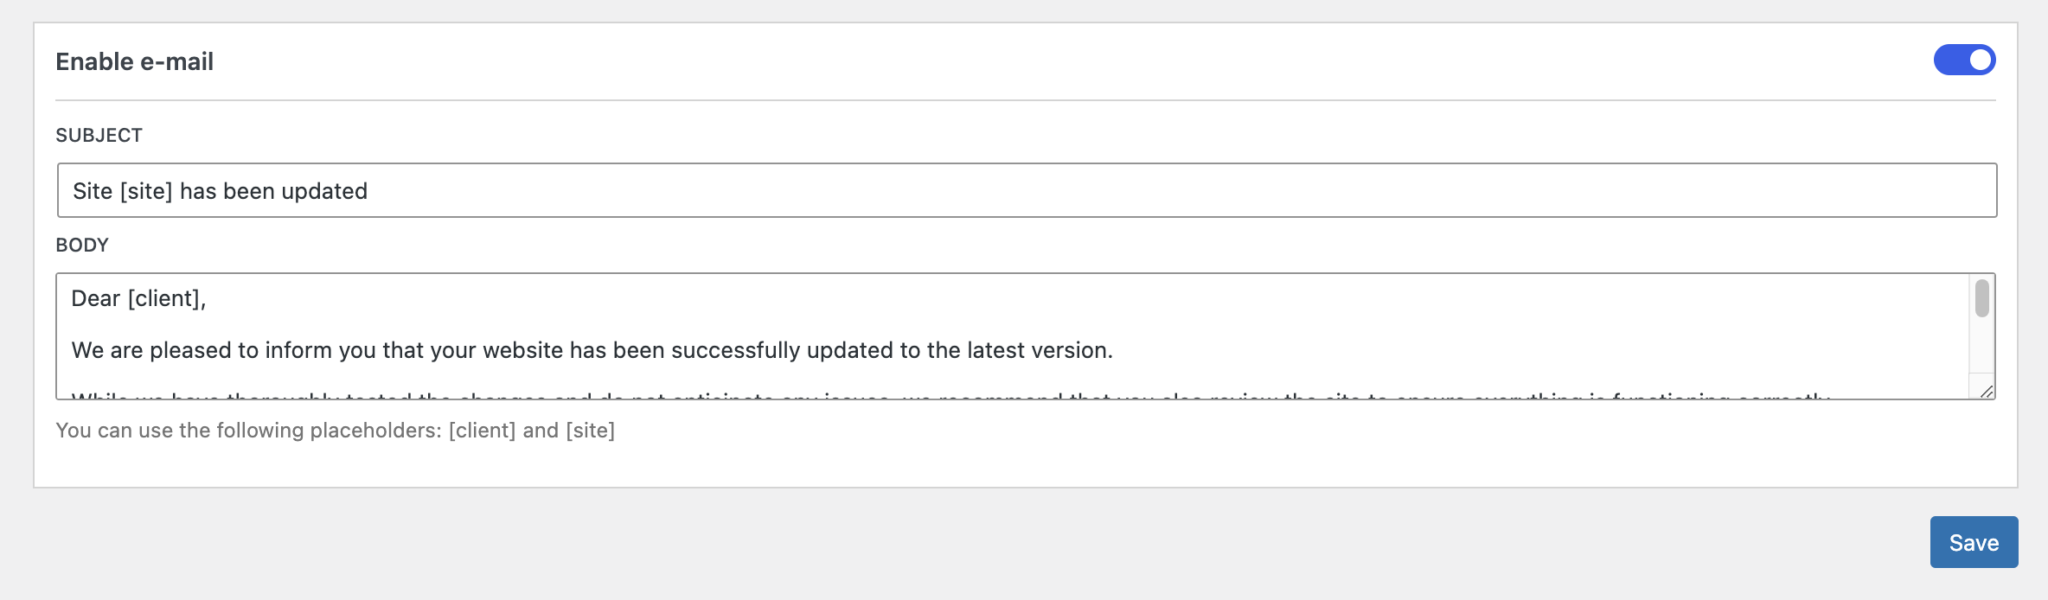
When you go to the plugin settings on your Monitor site you can enable e-mail notifications using the toggles. A subject and body field should appear. This is where you can add a default message for all of your sites notifications, so you don’t have to type one manually every time you update a site. Of course you can change the message and even use the available custom placeholders e.g. [site] and [client] which will get auto replaced with the site’s name and client you’re sending the email notification too.
2. Adding client email addresses
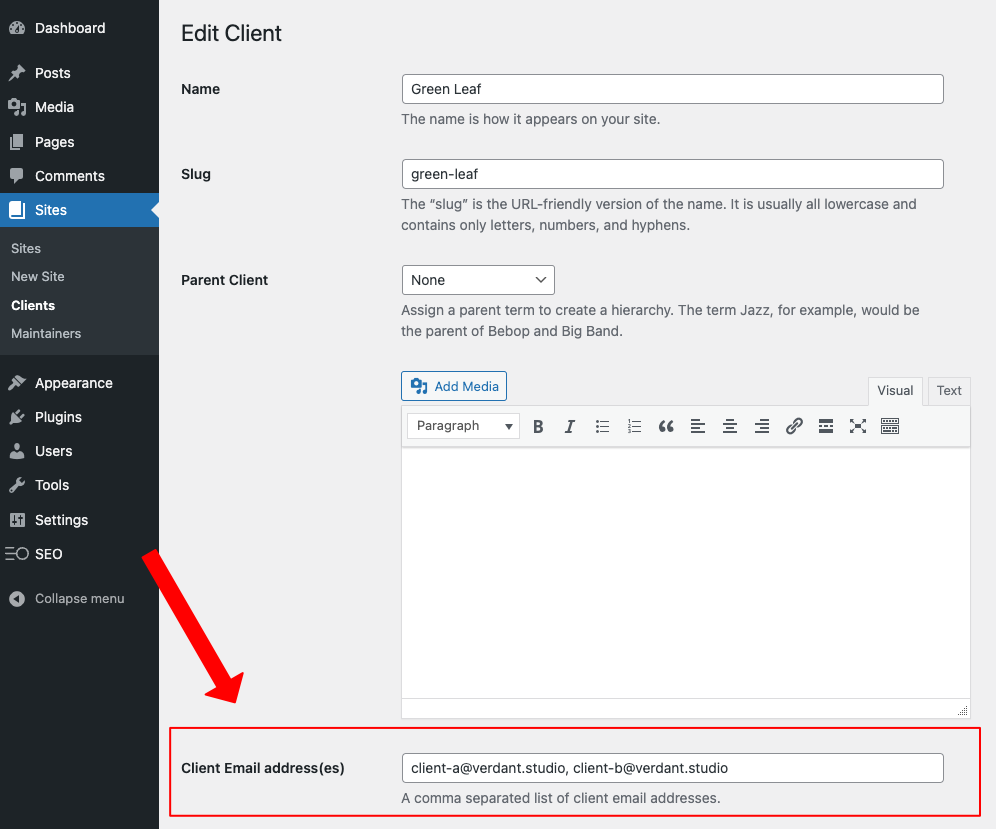
Over at the "Clients" taxonomy you can now add and edit client email addresses. You can add multiple of them by comma separation. These email addresses will receive any email notifications you send for a specific site.
3. Sending a notification
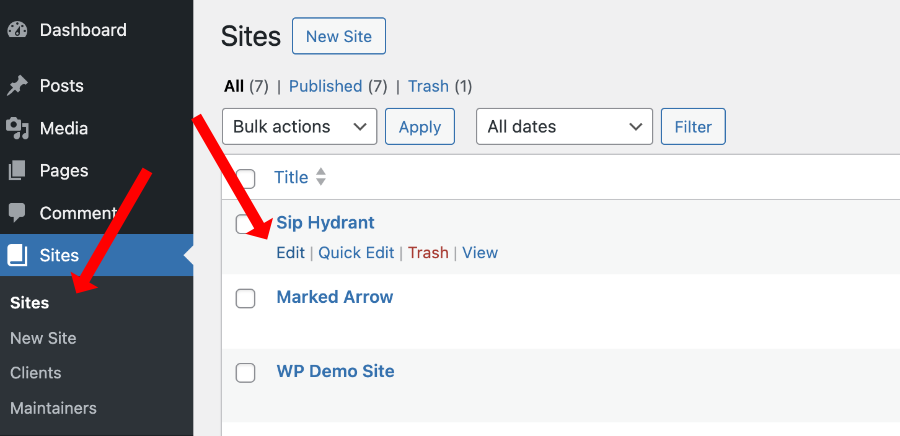
When you view the detail page of a site you’ll see a "Notify" component with the default message from the plugin’s settings. You might need to login to your WordPress site first since this functionality is only available for logged-in users to prevent abuse.

You can still modify the message, which should be great if you want to supply additional information about the update or want to send a different kind of message. Once you’re satisfied simply hit the "Send email" button and your e-mail should be delivered to your client(s).
Changing the site template
This plugin facilitates the registration of a Custom Post Type called "Sites", allowing you to create a customised single-sites.php template and apply your own HTML and styling to it.
You can find more information on how this works in the WordPress Theme Handbook.
Pagination
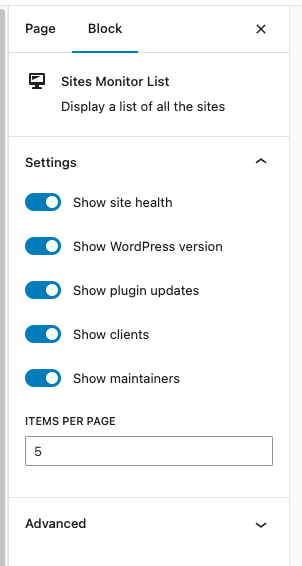
The Sites Monitor List block is a Gutenberg block which contains settings. When you select the block from the wp-admin and look at the block settings, you can insert how many sites to show per page with the "items per page" setting.
Default: 10
Prior to version 1.1.0:
The Sites Monitor List block uses the WordPress "post per page" setting for its pagination. In a brand new WordPress installation this number would be set to 10, if you want to change the number to something higher for example 50 you can change the setting at: Settings > Reading > Blog pages show at most 10.
Turn features on and off
The Sites Monitor List block is a Gutenberg block which contains settings. When you select the block from the wp-admin and look at the block settings, you can decide what information to show by using the toggles.
Default: all features on
WP-CLI
You can leverage WP-CLI to initiate a synchronization event. This capability allows you to customize synchronization intervals beyond default options, or prompt synchronization whenever you’ve made updates to your site.
INFO
Please note: this requires you to have WP-CLI available on your project or installed globally.
Synchronize data with the WP-CLI
Example usage single site
You can trigger the synchronisation event on a website which is already setup to synchronise to a monitor via:
wp cron event run wpsm_push_eventExample usage with multisites
Using a multisite? You can use the URL parameter to specify which site the request originated from:
wp cron event run wpsm_push_event --url=<url>Security
We maintain and improve this plugin with security in mind, a simple example is the fact that the data is sent to the monitor site and not fetched from any site. The monitor site does not need access to any production site to collect metrics. However, we do recommend you follow the security best practices below to further improve your websites' security.
Security best practices
Make sure the monitor site is private
The collected metrics are not directly sensitive, however indirectly, metrics such as the current versions of installed plugins can give hackers a clue where to look for weaknesses. For this reason we recommend you make sure the monitor site can only be viewed by you and your team via VPN connection or IP whitelist for example.
Make sure the monitor site is a single purpose site
This plugin uses the WordPress application password feature to allow the sites you want to watch to access private endpoints on the monitor site. We recommend you only use a monitor site for this single purpose. Do not use it as a real website and do not mix it with any other sensitive information. That said, we use AES-256 encryption on the password to make it virtually uncrackable by brute force even if it were to be leaked.
FAQ
The data is not being synchronised at the given interval
This plugin uses the WP-cron to schedule events which synchronise the data. WP-cron is the system built into WordPress to handle the scheduling of time-based tasks and to simulate a system-cron. However, WP-cron is not always reliable on low traffic sites because it needs traffic to call the scheduled events. See: Understanding WP-Cron Scheduling.
If your site does not get visits regularly, and you really want the tasks to run on time – take a look at: Hooking WP-Cron into the System Task Scheduler.
Premium: do I need to insert the license at every installation?
No, you only need to insert the license at the site which is your monitor. In fact, you can use the free version of our plugin on your other sites.
Does this plugin affect the performance of my site?
Sites Monitor only uses a few API’s and sends a minimal amount of data to the site which acts as the monitor. You can configure at what interval this is done: per hour, day, twice a day or weekly. The monitor site itself does not need to fetch or crawl for data. We’ve been using this plugin on quite a lot of sites and have not seen performance regressions.
Can I use this plugin with Composer?
Absolutely! It was designed to work both with and without Composer.
Do you offer refunds?
We stand by the quality of our plugins and will refund 100% of your money within 14 days of the original upgrade date if you experience issues which make the plugin unusable and we are unable to fix it.
Can I cancel my premium subscription at anytime?
Yes. You can cancel your subscription at any time from your personal account.
I have other pre-sale questions, can you help?
Yes! You can get in touch with us via the contact page.
Changelog
1.7.5: Jan 27, 2025
- Change: update various dependencies
1.7.4: Oct 27, 2024
- Change: update dependencies
- Fix: only enable gutenberg blocks when site is of type monitor
1.7.3: Sep 25, 2024
- Change: update dependencies
1.7.2: Aug 21, 2024
- Fix: improve type check before sending data
1.7.1: Jul 18, 2024
- Fix: make notify component loader consistent with other components
[Premium] - Fix: consistency of buttons on the detail view
- Fix: consistency of input fields on the detail view
- Fix: apply fixes of Freemius latest sdk
- Change: health text to site health
1.7.0: Jun 27, 2024
- Add: scan your website using multiple popular services for insights
- Add: show success message after notification send
[Premium] - Change: show direct error message on notification without error prefix
[Premium] - Change: disable the send email button when not logged in
[Premium] - Change: remove list items from error tooltip for better styling
1.6.2: Jun 22, 2024
- Fix: return correct status code when email sending fails due to missing data
- Fix: under some circumstances certain variables were not set
1.6.1: Jun 21, 2024
- Fix: omit certain dist files
1.6.0: Jun 21, 2024
- Add: send e-mail notifications functionality
[Premium] - Change: styling of plugins panel
- Change: styling of error components both on the front and admin
- Change: replace phpdoc params with php types
1.5.0: May 16, 2024
- Add: search is now a free and default feature
- Change: move scripts to viewScript and make sure assets are loaded on demand
- Change: remove project translations and use translate.wordpress.org instead
- Change: enforce blocks to be added only once per page
1.4.0: Apr 18, 2024
- Add: a getting started widget to the admin settings
- Add: a cron status widget to the admin settings when type is site
- Change: update site links to verdant.studio (new site)
- Change: update npm deps, blocks to v3 and improve webpack build
- Change: update freemius sdk to latest
[Premium]
1.3.2: Mar 28, 2024
- Change: improve plugin path existence check
- Fix: search when paginating
- Fix: x-wp-doingitwrong header
1.3.1: Mar 1, 2024
- Add: user count to detail view
- Change: remove the last margin bottom on elements within a section on the detail view
- Change: move notes above plugins on detail view
[Premium]
1.3.0: Feb 5, 2024
- Add: create site notes while editing a site on a monitor
[Premium] - Add: display site notes on the site detail view
[Premium] - Change: improved display of plugin names on the detail view
- Change: improved error notice styling
- Fix: translations on the admin settings page
1.2.1: Jan 30, 2024
- Change: update libs
- Fix: scope conflicting vendor dependency (all deps now scoped)
1.2.0: Dec 19, 2023
- Add: show errors by icon and tooltip on the detail view
- Change: codebase setup for better testing
- Change: only set schedule on sites of type site
1.1.2: Nov 13, 2023
- Fix: plugin info not showing when all up-to-date
1.1.1: Nov 12, 2023
- Add: site address to the site detail view for easy access
- Change: hide upgrade link when site is not a monitor (cleaner!)
- Change: disable deactivation feedback form (cleaner!)
- Change: update translations
- Fix: fallback to default version when not activated / inactive
[Premium]
1.1.0: Oct 18, 2023
- Add: toggle features to the settings of the Sites Monitor list block
- Add: pagination as a setting to the Sites Monitor list block
- Change: improve style of the Gutenberg blocks on the editor side
- Change: update translations
- Change: update logo, readme and add a new screenshot
- Fix: decode any html entities on clients and organisation on the front-end of the list view
[Premium]
1.0.6: Sep 28, 2023
- Add: show placeholder message when no sites exist yet…
- Change: update Dutch translations
- Change: improve formatter
- Change: add default color to list headings
- Change: make list headings semibold
- Fix: api path for subdirectory sites
1.0.5: Sep 21, 2023
- Fix: unable to create a new site
1.0.4: Sep 21, 2023
- Add: display message when a site connection fails due to a ip restricted redirect
- Add: remove trailing slash on the site url when establishing a connection
- Change: remove padding around the head labels on the sites monitor list
- Fix: do not apply search filter when the search is empty
[Premium]
1.0.3: Sep 20, 2023
- Add: initial sorting icon to rows which can be sorted on the list block
- Add: search functionality, filter rows by searching
[Premium] - Add: latest version of WP coding standards
- Change: translations
- Change: hover on rows which cannot be sorted
- Change: plugin screenshots / banner
- Change: show partial changelog on plugin description with link to full changelog on our site
1.0.2: Sep 15, 2023
- Change: remove contact and support links from sub menu
- Change: remove table layout-fixed for better responsiveness
- Fix: premium missing decode of html entities in site names
[Premium] - Change: update code to latest versions
1.0.1: Sep 7, 2023
- Add: Dutch language translations
- Add: use the WP posts per page setting for pagination
- Change: only show a single loader when refetching
- Change: remove unused license option from database and components
- Fix: only display published sites in the site list
1.0.0: Aug 31, 2023
- Change: huge performance boost by caching the latest version results
- Fix: sorting on paged results
- Fix: decode html entities in site names
0.1.1: Aug 17, 2023
- Add: open the site in a new tab when clicking on the site name
- Change: add new plugin screenshots
0.1.0: Aug 16, 2023
- Add: assign maintainers to sites
[Premium] - Add: show maintainers on the list and detail views
[Premium] - Change: removed sorting on clients
[Premium] - Change: performance improvements to the list view
- Change: update readme with new premium feature "maintainers"
0.0.9: Aug 10, 2023
- Add: sort and filter the table by name, version, plugin status and site health
0.0.8: Jul 29, 2023
- Change: disable auto complete on AP field
- Fix: monitor settings not saving
0.0.7: Jul 20, 2023
- Change: keep only one changelog file
- Fix: pointing to the wrong tag
0.0.6: Jul 19, 2023
- Add: assign clients to sites
[Premium] - Add: show clients on the list and detail views
[Premium] - Change: distinguish data retrieval by data which needs to be polled and one time data which is unlikely to change
- Change: handle errors independently, if one fails others may still succeed
- Change: improve the way errors are displayed on the list and detail views
- Change: improve styling of the list and detail views
0.0.5: Jun 29, 2023
- Change: the Sites Monitor List block is now a (responsive) table taking up less space
- Change: CSS styles are totally independent of the theme
- Change: the borders on the detail view were changed to shadows for consistency
0.0.4: Jun 26, 2023
- Fix: set interval to empty field by default
0.0.3: Jun 25, 2023
- Add: monitor block to site on site creation at the monitor site
0.0.2: Jun 25, 2023
- Fix: include JS assets in the plugin
0.0.1: Jun 25, 2023
- Init: first release of the plugin